Monday, January 5, 2015

Christmas Memories - Jan 2nd Sketch.


Can you believe it is the 5th of the month already.
 
It's going to be another fast year!
 
Jane with you today here on the
 Stuck On U sketches Blog,
 with my take on Leah's great sketch,
 which you will find on the right side bar.


Using up some older papers from
 Kaiser "Twig & Berry"
 and a great photo from our
 recent visit to Santa.
 
This was the BEST SANTA EVER!
Thus the subtitle at the bottom! 


A wee bit of Crate Paper bobble trim,
from their Peppermint Collection.


Standard distressing of paper layers,
and lots of Collectables from the
 Twig & Berry collection.
 
 Two Prima flowers to finish
 "Holiday Celebration Poinsettias"


First layout of 2015 complete.


I hope you have time to join our Sketch Challenge,
and add your layout to our blog.
 
We love to see what you come up with.
 
So many different interpretations of the
 same sketch.
 
Gotta love Scrapbooking.
 
Hope to see your entries soon!
 
Love & Hugs


Sunday, January 4, 2015

Enjoy the Little Things

Hello and Happy New Year!


This is Rosie from As Seen In My Scrapbook with my take on the first sketch of the New Year.

{supplies: patterned, corrugated paper, die cuts, buttons, tickets, stickers & envelope-Fancy Pants Collecting Memories Scrap Shotz monthly kit; bling-Basic Grey; die cut paper (green)-Making Memories}

I stuck fairly closely to the sketch, it's such a good one so why mess around with it too much ;)).

I took the leftovers from a montly kit and started layering a patterned paper "base" on the white card stock. The papers were all leftover cuts from 12x12 sheets. I had one envelope left from the same kit so I put it to good use tucking it under the matted photo on the right side.
I created a border of tickets along the bottom of the photo and layered some die cuts along the left side and on the left upper corner of the photo.

Once I had all the bits and pieces laid out the way I wanted I took a photo with my iPhone so I'd be sure to glue everything down the same. I finished it off with some bling I've had hanging around forever! 

I hope you'll kick off the New Year taking on this sketch challenge, link us up via the Current Sketch Challenge on the sidebar!


Saturday, January 3, 2015

Special Moments With You


Hi everyone and HAPPY NEW YEAR.
Caroleanne here with you today from CAROLEANNES BLOG , The Pretty Paper Patisserie, to share with you my first layout for STUCK ON U SKETCHES for 2015.
 I hope you had a blessed Christmas and Peaceful new year and
 Welcome to our very first sketch of 2015! Seems weird to say that! Its a brilliant sketch by our lovely Leah, I really loved this one, and I have to say it was a quick and easy one for the beginners out there.
 I loved this sketch and hope you do too. For more inspiration do visit all the other Design Team members during this week for lots of fabulous designs.
HERES HOW 
Choose a sheet of  12x12 inch pretty paper for your base
Adhere a 9.5 x 9.5 inch square of pale blue cardstock
Matt a 5 x 7inch photo onto pale blue cardstock
Adhere a 9x9 inch piece of pretty paper
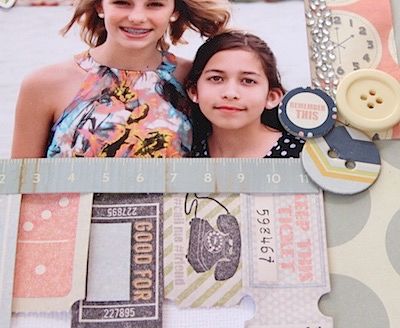
Add the matted photo
Start to decorate all around the edges of photo as per the sketch
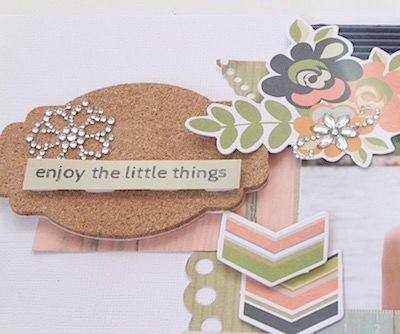
Cut out some flowers from a sheet of pretty papers and attach
Die-cut leaves and branches, ink the edges and add
Stamp and cut out some flowers, add pearl centres
Finish off with more pearls and mini roses
Cut out a title, matt onto the blue cardstock and attach.
Or, follow along with my 5 steps to the perfect layout for your own  version here, or see below
SCRAPPY STASH 
Pretty papers - Heartfelt Creations, Raindrops on Roses
Title - Raindrops on Roses Collection
Cardstock, pale blue, pale green
Classic leaf die - Heartfelt Creations
Flower die - Sun Kissed Fleur, Heartfelt Creations
Flower stamp - Sun Kissed Fleur, Heartfelt Creations
Pale pink chalk ink
Pale brown chalk ink
Assorted sticky back pearls
Mini roses
LINKS
How to make the flowers here https://www.youtube.com/watch?v=OXjptfntRwU
FIVE STEPS TO THE PERFECT LAYOUT
Step 1 - The Focal Point
Choose photo/photos, matt them in co-ordinating cardstock so that they stand out on your page.
Step 2 - The Background
Choose the background cardstock/ or pretty papers to co-ordinate with matted photo, choose all matching embellishments etc.
Step 3 - The Border
Always try to use a border to bring the page together.
Step 4 - The Embellishments
The best part, time to decorate with flowers, butterflies, leaves etc.
Step 5 - The Title and Journaling
By putting a title on the layout, you give meaning to the page.
The Journaling, on the page, or hidden, lets everyone know what is going on and gives you the chance to add your thoughts/ memories.


THATS ALL FOR NOW

SEE YOU AGAIN SOON.

Friday, January 2, 2015

Our FIRST Sketch Challenge of 2015!


Hi friends, Leah here today sharing the very first
sketch of 2015! WOOHOO! 


   Since I am still dealing with some health issues lingering from December I wanted to do a layout that wasn't the usual extreme time suck that most of my involved die cutting projects are. My only die cut piece is the sketchy circles in the background. Cut on glitter paper, that was tricky to pull apart, even on this bigger scale. 

   The rest of my page is created with stickers that came from the paper collection and then some other layering pieces from my stash. It was nice for a change to put together something that could come together a bit more quickly! Good for some instant gratification! LOL!


It was such a treat to get to create this, since it was my first layout in some weeks! 
You almost don't realize how much you miss something until you really get to do
it again! Thanks again for visiting and hope you'll share your
creation with us today! So get scrapping!
post signature


Thursday, January 1, 2015

HAPPY NEW YEAR!


Happy New Year
to all our friends here at 
Stuck on U Sketches!
We appreciate so much all of you that have
faithfully visited here,
those that share their talent with us
and each and every lady
who's been on our team these last 5 years!

We hope that 2015 will be the BEST year
and the MOST creative one!

Blessings to all!

Let me share my project today featuring a clean and simple
card design using a darling background die cut, champagne bottle and some metal dies. 


Pretty great how using something eye catching like glitter can make
a more simple project still pop! I even layered some confetti behind the vellum for more interest. 


Thanks for visiting today!